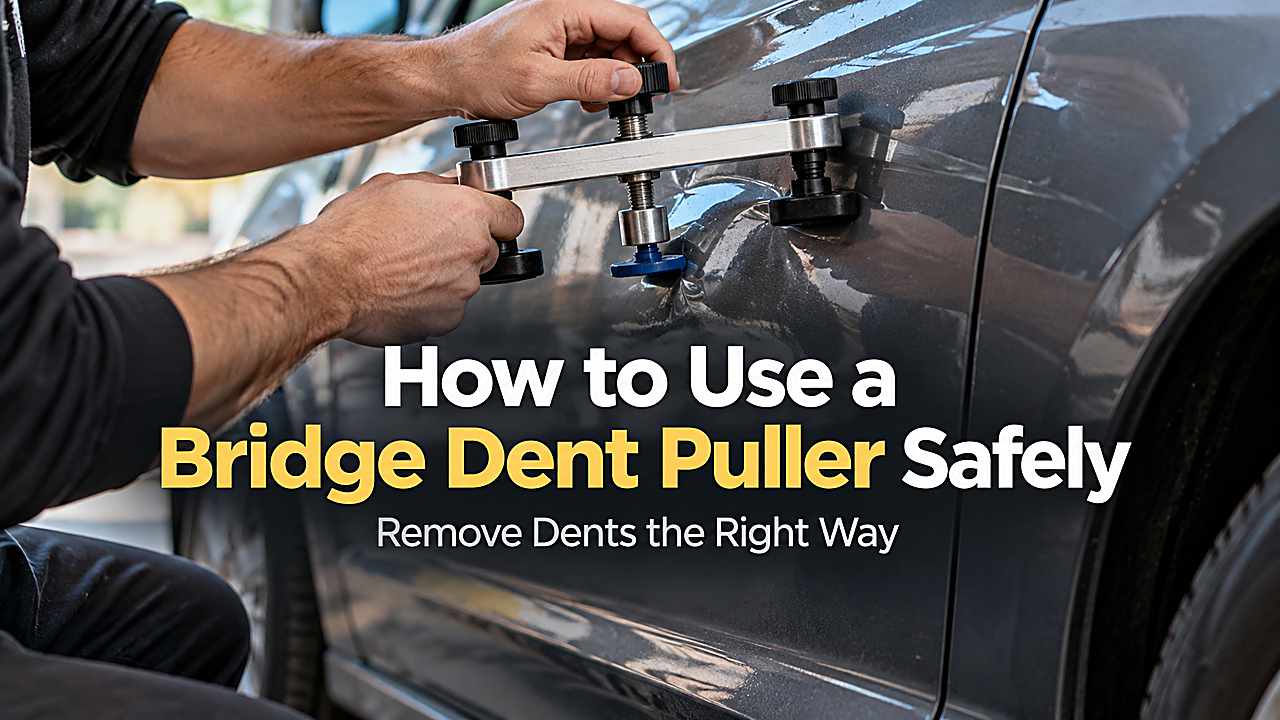
A bridge dent puller is safest when you use it for a shallow, paint-intact dent in open sheet metal, attach a correctly sized glue tab near the lowest point, set the bridge feet on clean protected paint, and turn the puller gradually while watching the panel in reflected light. The goal is tiny controlled movement, not one dramatic pop.
Stop immediately if paint begins lifting, the panel turns into a high spot, or the dent sits in a sharp crease, edge, body line or previously repainted area you are not prepared to risk.
Use a clean panel, paint-safe glue, the smallest effective tab and gradual screw tension. Release, inspect and repeat rather than cranking the bridge until the dent suddenly jumps outward.
Why the bridge design is useful for beginners
A bridge spans the dent with two or more feet while a center screw pulls the glued tab upward. Unlike a slide hammer, the force increases gradually and is easier to stop. That makes it a good tool for soft shallow dents.
The bridge still cannot tell you when the surrounding metal needs knockdown work, so observation matters. Do not let a low asking price change the standard of proof you require. A cheap vehicle with unclear title, structural or mechanical risk can cost far more than a correctly priced car with honest cosmetic wear.
Choose the dent before choosing the tool
Good candidates are smooth and paint-intact
A simple door ding in the middle of a flat panel gives the bridge room to sit and the metal room to move. The paint should show no cracking.
If the dent has a sharp center or crease, the bridge alone is unlikely to finish it cleanly. A pre-purchase inspection remains one of the highest-value steps because it turns hidden uncertainty into a list you can price. Even experienced buyers use specialists when structure, electronics or drivetrain condition is difficult to judge.
Avoid stiff edges and curved character lines
Bridge feet need stable support outside the damaged area. On a narrow body line or near an edge, the feet can sit on geometry that distorts the pull direction. This can create additional highs.
Professional tools and access are better for those locations. Keep copies of photos, scan reports, quotes and key paperwork when the finding affects price. Clear documentation makes negotiation shorter and prevents memory from becoming less accurate after you have viewed several vehicles.
Resale matters too. A condition you are willing to accept today can still reduce the number of future buyers, dealer trade options or insurance choices, so include the exit value in the purchase decision.
Prepare the surface and bridge feet
Wash and dry the panel, then clean the tab area with the kit-approved surface cleaner. Make sure the bridge’s contact pads are clean and soft. Dirt under the feet can scratch the clear coat as pressure increases.
Do not place hard metal directly on the finish. Your final number should include the repair or ownership cost that will actually fall on you, not a generic internet average. Local labor rates, vehicle design and parts availability can change the economics quickly.
A safe bridge-puller sequence
1. Match the tab to the dent rather than covering the whole area.
Use a tab close to the size and shape of the low spot. A huge tab pulls healthy metal with the dent.
Apply the correct glue evenly and center the tab. Resale matters too. A condition you are willing to accept today can still reduce the number of future buyers, dealer trade options or insurance choices, so include the exit value in the purchase decision.
2. Let the glue reach its specified set time.
Temperature affects adhesion. Follow the kit instructions and avoid direct sun on a hot panel.
Do not accelerate curing with extreme heat or cold. That distinction matters because the visible symptom is only one part of the decision. You should connect what you see with ownership records, service history, repair cost and what an independent inspection can verify.
3. Center the bridge over the tab.
The pull screw should be aligned as closely as possible with the desired pull direction. Keep both bridge feet outside the deepest part of the dent.
If one foot sits in the low area, the tool can distort the panel. A useful rule is to treat every finding as a reason for the next check rather than as a final verdict. When several independent clues point in the same direction, your confidence becomes much stronger.
4. Add tension in small increments.
Turn the adjustment slowly until you feel the panel load. Make a small lift, pause and inspect. Do not keep tightening because the dent has not moved instantly.
Sheet metal can release suddenly. Do not let a low asking price change the standard of proof you require. A cheap vehicle with unclear title, structural or mechanical risk can cost far more than a correctly priced car with honest cosmetic wear.
If the seller can document the explanation and the vehicle supports it, the issue may be manageable. If the story changes or inspection access is restricted, that uncertainty deserves real weight in your decision.
5. Release and inspect before the dent looks perfect.
Remove tension and check the reflection. It is better to remain slightly low than to create a high spot. Reattach and make another small pull if needed.
Several cycles give you more control. If the seller can document the explanation and the vehicle supports it, the issue may be manageable. If the story changes or inspection access is restricted, that uncertainty deserves real weight in your decision.
6. Remove glue with release agent rather than force.
Use the specified solvent or release agent and a plastic scraper. Twisting the tab aggressively can damage paint.
Clean the area before the next attempt. Your final number should include the repair or ownership cost that will actually fall on you, not a generic internet average. Local labor rates, vehicle design and parts availability can change the economics quickly.
Learn to recognize over-pulling
A high spot distorts reflection in the opposite direction
Under a line light or reflected straight edge, a high pushes the reflection outward. If you see this, stop.
More bridge tension only makes it worse. That distinction matters because the visible symptom is only one part of the decision. You should connect what you see with ownership records, service history, repair cost and what an independent inspection can verify.
A ring around the dent can mean the center moved before the crown
Some dents develop raised tension around the low. Professional PDR uses knockdowns to manage this crown. If you do not understand where to tap, avoid experimenting on a visible panel.
A bridge is not a complete PDR system. A useful rule is to treat every finding as a reason for the next check rather than as a final verdict. When several independent clues point in the same direction, your confidence becomes much stronger.
Paint risk is highest on unknown refinishing
A bridge pull transfers force through the adhesive and paint. Refinished panels can have weaker adhesion than factory coatings depending on preparation. If you know the panel has been repainted, consider professional PDR or conventional repair.
Never bridge-pull over cracked clear coat. Resale matters too. A condition you are willing to accept today can still reduce the number of future buyers, dealer trade options or insurance choices, so include the exit value in the purchase decision.
When to stop the DIY attempt
Stop when the dent stops improving after a few controlled pulls, the glue repeatedly fails, the panel becomes wavy or the paint changes. Continuing out of frustration is how a small repair becomes a body-shop job. A PDR technician can often correct a low dent more easily than an overpulled one. That distinction matters because the visible symptom is only one part of the decision. You should connect what you see with ownership records, service history, repair cost and what an independent inspection can verify.
Protect the original finish before chasing perfection
Factory paint has value, and a slightly visible ding is often cheaper to live with than a failed DIY repair that now needs refinishing. Make every correction reversible when possible, stop when the surface becomes unpredictable and get a professional quote before using stronger force. The best DIY result is controlled improvement without creating a new defect.
Resale matters too. A condition you are willing to accept today can still reduce the number of future buyers, dealer trade options or insurance choices, so include the exit value in the purchase decision.
Frequently Asked Questions
A bridge puller is controllable, but only if you treat each pull as a small adjustment. These answers focus on preventing the two common failures: paint damage and over-pulling.
How tight should you turn a bridge dent puller?
Only enough to create controlled movement. There is no universal number of turns because panel thickness, tab size and dent shape differ. Increase tension gradually and inspect often.
If you are forcing the tool, the dent may not be a good bridge-puller candidate. Keep copies of photos, scan reports, quotes and key paperwork when the finding affects price. Clear documentation makes negotiation shorter and prevents memory from becoming less accurate after you have viewed several vehicles.
Can you use a bridge puller on a repainted panel?
You can physically attach it, but paint-pull risk is higher because adhesion quality is unknown. Many PDR technicians treat repainted panels cautiously. If you care about preserving the finish, get a professional assessment.
Do not assume aftermarket paint is as secure as factory paint. Resale matters too. A condition you are willing to accept today can still reduce the number of future buyers, dealer trade options or insurance choices, so include the exit value in the purchase decision.
What glue should you use with a dent puller?
Use glue formulated for PDR and appropriate to the working temperature. Craft glue can have the wrong bond strength and release behavior. Manufacturers sell different formulations for cool and hot conditions.
Match the glue to the kit and environment. That distinction matters because the visible symptom is only one part of the decision. You should connect what you see with ownership records, service history, repair cost and what an independent inspection can verify.
Why will the glue tab not stick?
Wax, silicone, cold temperature, weak glue-gun heat or dirty paint can prevent adhesion. Clean the area with the approved prep product and allow it to dry. Confirm the glue gun is fully hot.
Do not solve adhesion problems by sanding paint. A useful rule is to treat every finding as a reason for the next check rather than as a final verdict. When several independent clues point in the same direction, your confidence becomes much stronger.
Can a bridge puller remove a sharp door crease?
It may improve part of the dent but is unlikely to restore a sharp crease cleanly by itself. Creases require tension management and often precise knockdown or backside work. Beginners should avoid learning on them.
A professional PDR quote is safer. Do not let a low asking price change the standard of proof you require. A cheap vehicle with unclear title, structural or mechanical risk can cost far more than a correctly priced car with honest cosmetic wear.
Conclusion
When you are dealing with how to use a bridge dent puller safely, good decisions come from controlled steps rather than confidence alone. Use the evidence you can collect yourself and involve a specialist when the risk becomes difficult to measure.
If the numbers and evidence still make sense after those checks, move forward confidently. If they do not, walking away or choosing the simpler repair is often the most profitable decision.