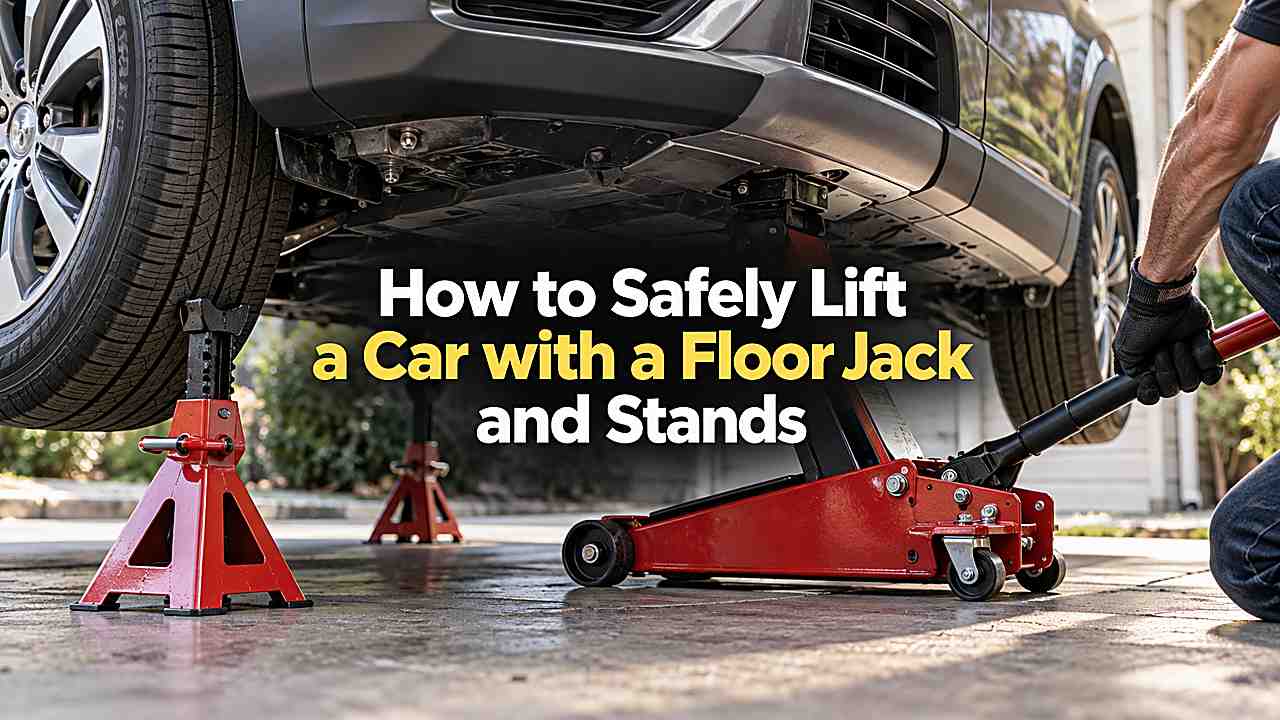
To lift a car safely, park on solid level ground, apply the parking brake, chock the wheels that stay on the ground, identify the manufacturer-approved jack and support points, raise the car with a properly rated floor jack, and lower it onto correctly rated jack stands before you go underneath.
Never work under a vehicle supported only by a hydraulic jack. The jack raises the car; the stands support it.
Use approved lift points, rated equipment and a solid level surface. Chock the opposite wheels, raise the car slowly, place stands at approved support points and verify stability before working underneath.
Read the vehicle lifting diagram first
Owner manuals and service information identify pinch welds, crossmembers, subframes and other approved points. Do not jack randomly on a floor pan, plastic cover or suspension piece just because it looks strong.
Electric vehicles also require special care around battery enclosures. Think about storage and repeat use as well as the immediate job. A product that works perfectly once but is awkward to store, service or replace can become a poor home-garage choice over time.
What this means for your setup
Your best result comes from matching capacity to the task with some margin. Running tools continuously at their limit creates heat, wear and frustration even when the specification says the job is technically possible. A controlled process is usually faster in the end because it prevents rework. If one step begins behaving differently from what you expect, stop and inspect before adding more force, heat, pressure or chemical strength.
Prepare the ground and vehicle
Work on level concrete or another hard surface that can support the jack and stands without sinking. Put the transmission in Park or gear as appropriate, apply the parking brake and chock wheels that remain on the ground.
Remove loose cargo if it can shift. When safety is involved, manufacturer procedures and rated equipment take priority over internet shortcuts. Saving a few minutes is never worth creating a lifting, electrical or braking hazard.
Position the floor jack correctly
Center the saddle on the approved lift point and make sure it will remain engaged as the jack arm travels. Some pinch-weld points need a compatible rubber adapter.
Roll the jack freely so it can move slightly as the lifting geometry changes. Your best result comes from matching capacity to the task with some margin. Running tools continuously at their limit creates heat, wear and frustration even when the specification says the job is technically possible.
Raise the car slowly while watching the contact point
Pump the jack until the tire clears only as much as needed. Stop if the vehicle shifts, the saddle starts sliding or the jack wheels cannot move.
Do not put any part of your body underneath during this stage. That detail matters because it changes how safely and efficiently the job can be completed. You should choose the tool or method around the actual vehicle and working conditions rather than a headline specification.
What this means for your setup
Good preparation also reduces the amount of expensive equipment you need. Clean surfaces, correct access and a clear workflow often matter more than buying the most powerful version of every tool. When safety is involved, manufacturer procedures and rated equipment take priority over internet shortcuts. Saving a few minutes is never worth creating a lifting, electrical or braking hazard.
Place jack stands at approved support points
Set both stands to equal height when supporting one end of the vehicle. Confirm the stand saddle fits the point and that the base sits flat.
Never place a stand under thin sheet metal unless the manufacturer specifically identifies it as a support location. A controlled process is usually faster in the end because it prevents rework. If one step begins behaving differently from what you expect, stop and inspect before adding more force, heat, pressure or chemical strength.
Lower the vehicle onto the stands gradually
Open the jack release valve slowly and watch the car settle. The stands should take the load squarely without leaning.
Keep the floor jack lightly positioned as a backup only after the stands are carrying the vehicle. Good preparation also reduces the amount of expensive equipment you need. Clean surfaces, correct access and a clear workflow often matter more than buying the most powerful version of every tool.
Perform a stability check before going underneath
With no part of your body under the car, push the vehicle firmly from the side and front. There should be no rocking or shifting on the stands.
If anything moves, raise the car and reposition the support. Think about storage and repeat use as well as the immediate job. A product that works perfectly once but is awkward to store, service or replace can become a poor home-garage choice over time.
What this means for your setup
Your best result comes from matching capacity to the task with some margin. Running tools continuously at their limit creates heat, wear and frustration even when the specification says the job is technically possible. A controlled process is usually faster in the end because it prevents rework. If one step begins behaving differently from what you expect, stop and inspect before adding more force, heat, pressure or chemical strength.
Lifting an entire car requires additional planning
When all four corners are raised, the first end can move as the second is lifted. Use a sequence appropriate to the vehicle and stands, and keep the work surface level.
If you are unsure, lift only the end needed for the job. When safety is involved, manufacturer procedures and rated equipment take priority over internet shortcuts. Saving a few minutes is never worth creating a lifting, electrical or braking hazard.
Lowering is the reverse process
Clear tools and people, raise the car enough to remove the stands, remove wheel chocks only after all wheels are on the ground, and lower slowly. Never pull a stand out while the car is barely touching it.
Your best result comes from matching capacity to the task with some margin. Running tools continuously at their limit creates heat, wear and frustration even when the specification says the job is technically possible.
Common lifting mistakes to avoid
Do not stack wood on the jack saddle, use cracked pavement, support a vehicle on cinder blocks or crawl under a car during tire-changing jack use. Do not exceed equipment ratings.
Replace damaged stands or leaking jacks rather than trusting them one more time. That detail matters because it changes how safely and efficiently the job can be completed. You should choose the tool or method around the actual vehicle and working conditions rather than a headline specification.
What this means for your setup
Good preparation also reduces the amount of expensive equipment you need. Clean surfaces, correct access and a clear workflow often matter more than buying the most powerful version of every tool. When safety is involved, manufacturer procedures and rated equipment take priority over internet shortcuts. Saving a few minutes is never worth creating a lifting, electrical or braking hazard.
What to verify before you start
When safety is involved, manufacturer procedures and rated equipment take priority over internet shortcuts. Saving a few minutes is never worth creating a lifting, electrical or braking hazard. That detail matters because it changes how safely and efficiently the job can be completed. You should choose the tool or method around the actual vehicle and working conditions rather than a headline specification.
Special considerations for EVs and hybrids
Battery-electric vehicles can have large battery enclosures covering much of the floor. Jacking on the pack or an unapproved underbody point can cause severe damage and potential high-voltage hazards. Use only the marked lifting points and the manufacturer procedure.
Some EVs are also much heavier than similarly sized gasoline cars. Confirm jack and stand capacity before lifting. A low-profile puck or adapter may be required at the pinch weld, but it must be designed for the vehicle.
Wheel-off work changes where you can support the vehicle
If you are removing a wheel, do not place the stand where it blocks the suspension or brake component you need to service. Consult the service manual for alternative approved support points. On some vehicles, a central front or rear jack point allows both sides to be raised evenly before stands are positioned at the side points.
Never improvise by supporting thin suspension arms or body seams that are not identified for lifting. A point strong enough to carry driving loads is not automatically shaped to support a stand safely.
Plan an escape path before you start working underneath
Keep enough space around the vehicle that you can slide out without moving the jack stands or climbing over tools. Do not pile wheels, parts or drain pans directly beside your shoulders. If you are working alone, keep a phone within reach but away from the area where it could be crushed or soaked.
Tell someone when you are doing extended under-car work if possible. Safe lifting is not only about equipment ratings; it is also about making sure a minor problem does not leave you trapped without help.
Frequently Asked Questions
Vehicle lifting is one area where shortcuts are not worth the time saved. These questions cover the mistakes that cause most home-garage lifting accidents.
Can you leave the floor jack under the car with jack stands?
Yes as a secondary backup when it does not interfere with the job, but the stands must carry the vehicle. A hydraulic jack can slowly leak down.
Never use the jack alone as the working support. Your best result comes from matching capacity to the task with some margin. Running tools continuously at their limit creates heat, wear and frustration even when the specification says the job is technically possible.
Where should you put jack stands on a unibody car?
Use the support points identified by the manufacturer, commonly reinforced pinch-weld or subframe locations. The exact points vary by vehicle. Do not assume any visible seam is safe.
Consult the manual or service information. That detail matters because it changes how safely and efficiently the job can be completed. You should choose the tool or method around the actual vehicle and working conditions rather than a headline specification.
Is it safe to jack a car on asphalt?
It is less ideal because jacks and stand feet can sink into hot or soft asphalt. Solid level concrete is safer.
If you must use another surface, follow equipment guidance and use load-spreading materials designed for the purpose. A controlled process is usually faster in the end because it prevents rework. If one step begins behaving differently from what you expect, stop and inspect before adding more force, heat, pressure or chemical strength.
Can you use ramps instead of jack stands?
Ramps are excellent for many under-car jobs when the wheels can remain installed and the ramp is properly rated. They do not help when the wheel or suspension needs to hang free.
Chock the opposite wheels and follow ramp instructions. Good preparation also reduces the amount of expensive equipment you need. Clean surfaces, correct access and a clear workflow often matter more than buying the most powerful version of every tool.
How much capacity should jack stands have?
Choose stands with a combined rating appropriate for the supported portion of the vehicle and follow the manufacturer’s rating convention. Do not assume one stand carries the full labeled pair rating unless the manufacturer specifies it.
More capacity does not compensate for incorrect placement. Think about storage and repeat use as well as the immediate job. A product that works perfectly once but is awkward to store, service or replace can become a poor home-garage choice over time.
Conclusion
Use approved lift points, rated equipment and a solid level surface. Chock the opposite wheels, raise the car slowly, place stands at approved support points and verify stability before working underneath. The safest and most cost-effective result comes from choosing capacity and technique for the real job rather than buying or using more than the situation requires.
If the vehicle, tool or procedure falls outside what you can verify confidently, use the manufacturer’s service information or a qualified technician. Good garage work is repeatable, controlled and safe.