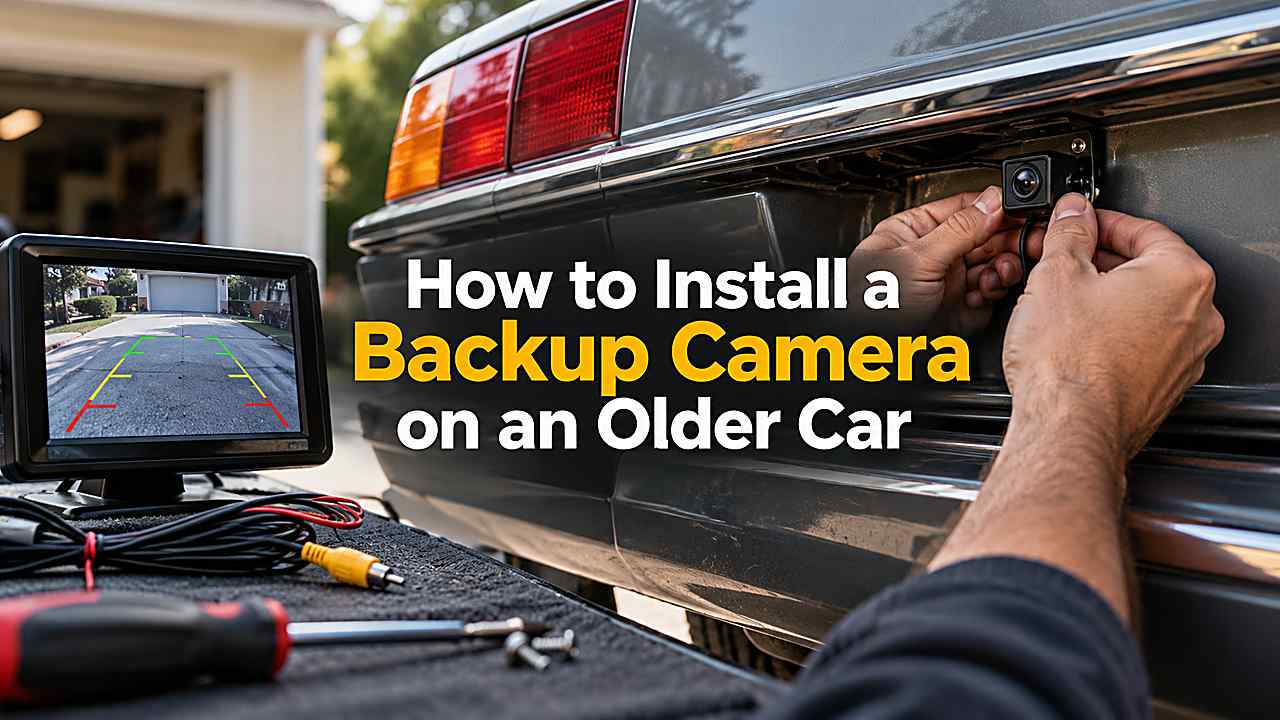
You can add a backup camera to most older cars with a camera, display or compatible head unit, fused power, a reverse-signal trigger and a video connection. The cleanest setup powers the camera from the reverse-light circuit so it activates when you shift into Reverse, while the display receives either the same trigger signal or an input from the head unit.
The difficult part is not mounting the camera. It is routing wiring away from airbags, hinges, exhaust heat and sharp metal while making weatherproof connections that will not fail after one winter.
Mount the camera near the vehicle centerline, power it through a properly fused reverse signal or manufacturer-approved harness, route video wiring safely to the display and test operation before reinstalling trim.
Choose the display before you start wiring
You can use an aftermarket head unit with a camera input, a mirror-style monitor or a small standalone screen. A head-unit installation looks the most integrated, while a standalone monitor is often easier on a classic or older car.
Think about storage and repeat use as well as the immediate job. A product that works perfectly once but is awkward to store, service or replace can become a poor home-garage choice over time.
What this means for your setup
Your best result comes from matching capacity to the task with some margin. Running tools continuously at their limit creates heat, wear and frustration even when the specification says the job is technically possible. A controlled process is usually faster in the end because it prevents rework. If one step begins behaving differently from what you expect, stop and inspect before adding more force, heat, pressure or chemical strength.
Choose camera placement for a useful view
Mounting near the license plate or trunk handle usually gives a centered view. The camera should show the bumper edge for distance reference without pointing so low that you lose surrounding traffic.
Check whether the camera image can be mirrored and rotated before permanent mounting. When safety is involved, manufacturer procedures and rated equipment take priority over internet shortcuts. Saving a few minutes is never worth creating a lifting, electrical or braking hazard.
Identify the reverse-light circuit correctly
Use a wiring diagram or multimeter rather than guessing by wire color. The reverse-light wire should show battery voltage only when the transmission is in Reverse. Back-probe carefully and avoid damaging insulation.
On some modernized or multiplexed vehicles, use an interface module instead of loading the circuit directly. Your best result comes from matching capacity to the task with some margin. Running tools continuously at their limit creates heat, wear and frustration even when the specification says the job is technically possible.
Run camera power through a fused and weatherproof connection
Many simple cameras draw very little current and are powered from the reverse-light feed. Use the fuse, connector and grounding method specified by the camera manufacturer. Do not twist wires together and cover them with household tape.
Heat-shrink or automotive connectors provide better durability. That detail matters because it changes how safely and efficiently the job can be completed. You should choose the tool or method around the actual vehicle and working conditions rather than a headline specification.
What this means for your setup
Good preparation also reduces the amount of expensive equipment you need. Clean surfaces, correct access and a clear workflow often matter more than buying the most powerful version of every tool. When safety is involved, manufacturer procedures and rated equipment take priority over internet shortcuts. Saving a few minutes is never worth creating a lifting, electrical or braking hazard.
Route the video cable away from damage
Follow factory harness routes when possible, secure the cable with clips and leave movement allowance at trunk or hatch hinges. Keep wiring away from airbags and seat-belt mechanisms. Use a grommet when passing through metal.
Never pinch the cable under trim. A controlled process is usually faster in the end because it prevents rework. If one step begins behaving differently from what you expect, stop and inspect before adding more force, heat, pressure or chemical strength.
Connect the reverse trigger at the display
Many aftermarket head units have a reverse-trigger input that tells the screen to switch to camera mode. Some video cables include a small trigger lead that carries the reverse signal forward. Follow the head-unit diagram.
A camera image with no automatic switching usually means the trigger circuit needs attention. Good preparation also reduces the amount of expensive equipment you need. Clean surfaces, correct access and a clear workflow often matter more than buying the most powerful version of every tool.
Test before putting the interior back together
Shift into Reverse with the parking brake set and a helper outside the vehicle when appropriate. Confirm image orientation, brightness and trigger operation. Check that brake lights, reverse lights and other circuits still work normally.
Only then reinstall panels. Think about storage and repeat use as well as the immediate job. A product that works perfectly once but is awkward to store, service or replace can become a poor home-garage choice over time.
What this means for your setup
Your best result comes from matching capacity to the task with some margin. Running tools continuously at their limit creates heat, wear and frustration even when the specification says the job is technically possible. A controlled process is usually faster in the end because it prevents rework. If one step begins behaving differently from what you expect, stop and inspect before adding more force, heat, pressure or chemical strength.
Weatherproof the rear installation
Seal drilled mounting holes against corrosion and water entry. Aim drip loops downward where wiring enters a camera or connector so water does not run into the plug.
Exterior connectors should be designed for automotive weather exposure. When safety is involved, manufacturer procedures and rated equipment take priority over internet shortcuts. Saving a few minutes is never worth creating a lifting, electrical or braking hazard.
Do not treat the camera as a replacement for mirrors
A retrofit camera can improve rear visibility but may not match the field of view, dynamic guidelines or calibration of a factory system. Continue using mirrors and direct observation.
Backup cameras are an aid, not a guarantee that the path is clear. Your best result comes from matching capacity to the task with some margin. Running tools continuously at their limit creates heat, wear and frustration even when the specification says the job is technically possible.
What to verify before you start
When safety is involved, manufacturer procedures and rated equipment take priority over internet shortcuts. Saving a few minutes is never worth creating a lifting, electrical or braking hazard. That detail matters because it changes how safely and efficiently the job can be completed. You should choose the tool or method around the actual vehicle and working conditions rather than a headline specification.
Check image delay and night performance before final mounting
Cheap cameras can look acceptable in daylight yet become noisy or washed out around license-plate lamps at night. Temporarily power the system and test in daylight and darkness before drilling or using permanent adhesive. Confirm that the bumper reference and parking lines match how you actually use the car.
If the display supports adjustable guidelines, calibrate them on a flat parking area. Painted guidelines are only a reference because camera angle, tire size and vehicle width can change what they represent.
Plan the camera cable path before removing trim
Walk from the license plate area to the screen and identify factory harness routes, trim panels and flexible boots through which wiring can safely pass. The cleanest installation usually follows existing body wiring rather than cutting a straight path across the cabin. Take photos as trim comes apart so clips and fasteners return to the correct places.
Do not route the cable across side-curtain airbag deployment paths or through seat tracks where it can be crushed. At a hatch or trunk hinge, leave enough slack for full movement without allowing the wire to rub on sharp metal.
Fuse and ground quality determine long-term reliability
If the camera uses a separate fused supply, place the fuse close to the source rather than at the far end of a long wire. Ground connections should be made to clean metal at an approved chassis point or through the harness specified by the kit. Paint, rust and loose self-tapping screws create intermittent camera problems that are frustrating to diagnose later.
After the system works, tug-test each connection gently and secure the harness so normal vibration cannot flex the wire at a connector. A reliable installation looks boring because nothing moves, chafes or hangs loose.
Label the added wiring for future service
Once the system is working, add a small label near the fuse or connection point identifying the backup-camera circuit and wire color. Future troubleshooting is much easier when you or another owner can tell which wiring is aftermarket. Keep the camera and monitor instructions with the vehicle records. A clean documented installation adds convenience without turning the dashboard or trunk into a mystery for the next repair technician.
Frequently Asked Questions
Backup-camera kits look simple because they contain only a few wires, but poor routing and bad trigger connections cause most DIY failures.
Can you connect a backup camera directly to the reverse light?
Many low-current cameras are designed to use the reverse-light circuit, but follow the camera and vehicle instructions. Some vehicles use monitored or multiplexed lighting circuits that can behave poorly with added loads.
An interface or relay may be more appropriate. Your best result comes from matching capacity to the task with some margin. Running tools continuously at their limit creates heat, wear and frustration even when the specification says the job is technically possible.
Do wireless backup cameras need wiring?
Yes. Wireless usually eliminates the long video cable, not the need for power. The rear camera still needs a power source, and the display needs power.
Wireless systems can also experience interference or delay. That detail matters because it changes how safely and efficiently the job can be completed. You should choose the tool or method around the actual vehicle and working conditions rather than a headline specification.
Can you install a backup camera without replacing the radio?
Yes. Mirror monitors and standalone screens allow you to keep the factory radio. This can be easier on older vehicles.
Choose a screen position that does not block visibility. A controlled process is usually faster in the end because it prevents rework. If one step begins behaving differently from what you expect, stop and inspect before adding more force, heat, pressure or chemical strength.
Why is my backup camera image upside down or reversed?
Some cameras have configurable mirror or orientation settings, sometimes through small loop wires or menu options. Confirm the intended mounting direction.
Do not rotate a camera randomly if its housing is designed to drain water in one orientation. Good preparation also reduces the amount of expensive equipment you need. Clean surfaces, correct access and a clear workflow often matter more than buying the most powerful version of every tool.
Should you drill into the trunk to mount the camera?
Only when necessary and after checking what is behind the panel. Many kits use license-plate brackets or factory trim locations.
If you drill, protect bare metal from corrosion and seal the opening properly. Think about storage and repeat use as well as the immediate job. A product that works perfectly once but is awkward to store, service or replace can become a poor home-garage choice over time.
Conclusion
Mount the camera near the vehicle centerline, power it through a properly fused reverse signal or manufacturer-approved harness, route video wiring safely to the display and test operation before reinstalling trim. The safest and most cost-effective result comes from choosing capacity and technique for the real job rather than buying or using more than the situation requires.
If the vehicle, tool or procedure falls outside what you can verify confidently, use the manufacturer’s service information or a qualified technician. Good garage work is repeatable, controlled and safe.