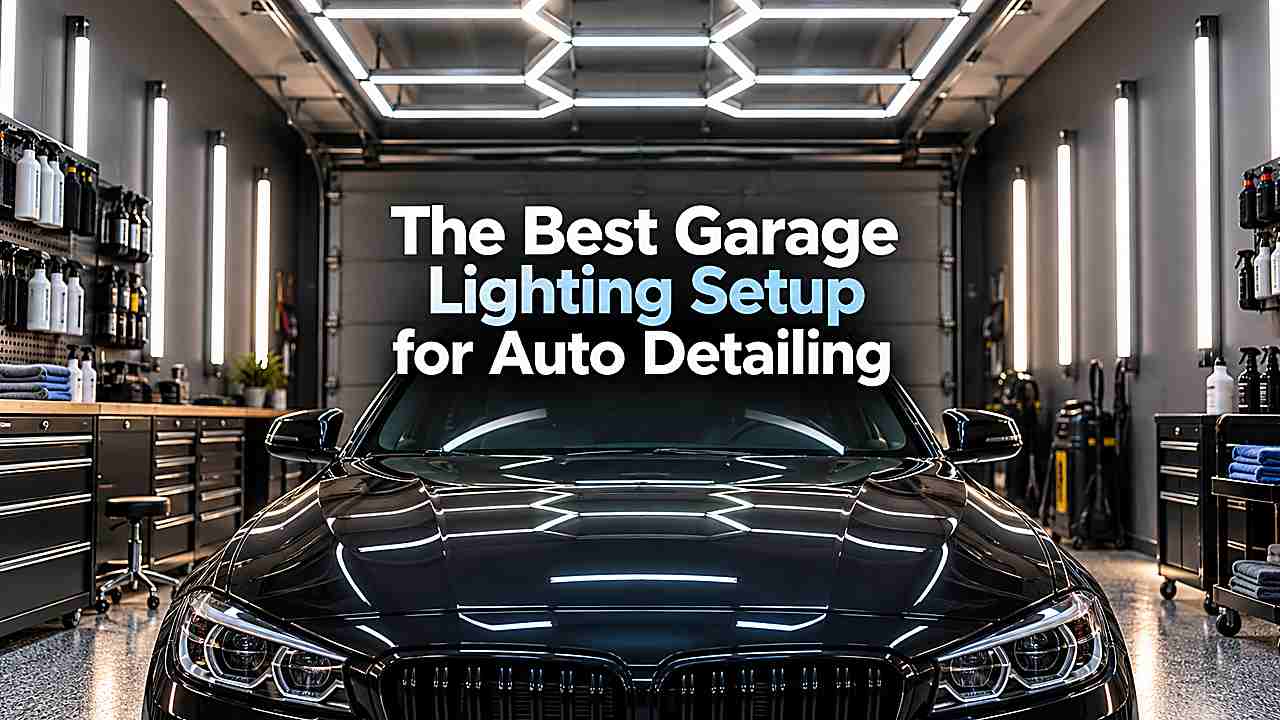
The best detailing garage uses two kinds of light: broad high-CRI ceiling illumination for working safely and strong directional inspection lighting for revealing swirls, haze and high spots. More lumens alone do not make paint defects easier to see if the light is too diffuse or the color quality is poor.
For a typical two-car garage, aim for bright even ambient coverage using multiple fixtures, then add movable high-CRI or color-match inspection lights around the vehicle. The combination is more useful than one enormous overhead fixture.
Use bright, even ceiling lighting plus directional inspection lights. Prioritize high color rendering, minimal dark zones and movable lights that can rake across paint at shallow angles.
Ambient light and inspection light solve different problems
Ceiling fixtures help you clean interiors, move safely and see general condition. Paint inspection requires a concentrated source that creates sharp reflections.
A garage can feel extremely bright and still hide swirls if every fixture is broad and diffuse. Good preparation also reduces the amount of expensive equipment you need. Clean surfaces, correct access and a clear workflow often matter more than buying the most powerful version of every tool.
Start with even ceiling coverage
Space fixtures so each side of the car receives light rather than placing everything directly above the roof. Long LED shop lights arranged in rows reduce shadows.
Light-colored walls and ceiling also improve usable brightness without adding power consumption. Think about storage and repeat use as well as the immediate job. A product that works perfectly once but is awkward to store, service or replace can become a poor home-garage choice over time.
What this means for your setup
Your best result comes from matching capacity to the task with some margin. Running tools continuously at their limit creates heat, wear and frustration even when the specification says the job is technically possible. A controlled process is usually faster in the end because it prevents rework. If one step begins behaving differently from what you expect, stop and inspect before adding more force, heat, pressure or chemical strength.
High CRI helps you judge color and finish
A higher color-rendering index makes interior materials and paint colors look more natural. For detailing, CRI 90 or higher is a useful target for work lights and color inspection.
Color temperature around 4000K to 5000K is comfortable for general work, while adjustable inspection lamps can help expose different defects. When safety is involved, manufacturer procedures and rated equipment take priority over internet shortcuts. Saving a few minutes is never worth creating a lifting, electrical or braking hazard.
Add vertical or side lighting if you polish paint regularly
Door panels are difficult to inspect when all light comes from the ceiling. Wall-mounted LED strips or movable stands place reflections where you need them.
Side light is especially useful for black and dark paint. Your best result comes from matching capacity to the task with some margin. Running tools continuously at their limit creates heat, wear and frustration even when the specification says the job is technically possible.
Use dedicated inspection lights for correction and coatings
SCANGRIP and similar detailing lights are designed around high color rendering and adjustable color temperature. A handheld light lets you check isolated scratches, while a tripod or stand unit provides consistent panel illumination.
You do not need premium inspection lights for washing, but paint correction benefits from them. That detail matters because it changes how safely and efficiently the job can be completed. You should choose the tool or method around the actual vehicle and working conditions rather than a headline specification.
What this means for your setup
Good preparation also reduces the amount of expensive equipment you need. Clean surfaces, correct access and a clear workflow often matter more than buying the most powerful version of every tool. When safety is involved, manufacturer procedures and rated equipment take priority over internet shortcuts. Saving a few minutes is never worth creating a lifting, electrical or braking hazard.
Avoid the honeycomb-lighting trap
Hex lights look impressive and provide broad illumination, but the pattern can create busy reflections that are not ideal for every correction step. Use them as ambient light if you like the look, then keep a separate simple inspection source.
Style should not replace function. A controlled process is usually faster in the end because it prevents rework. If one step begins behaving differently from what you expect, stop and inspect before adding more force, heat, pressure or chemical strength.
Control glare and shadow around the vehicle
Matte or light-colored walls help, while highly reflective clutter can create distracting hotspots. Position lights so you can inspect from several angles without staring directly into the LEDs.
Adjustable stands are useful because panel geometry changes from hood to doors to quarter panels. Good preparation also reduces the amount of expensive equipment you need. Clean surfaces, correct access and a clear workflow often matter more than buying the most powerful version of every tool.
A practical two-car-garage layout
Use two or three rows of ceiling fixtures across the parking bays, add side fixtures or movable stands on both sides, and keep one handheld inspection light at the workbench. Put switches in zones so you do not need full power for every job.
This setup scales from interiors to polishing. Think about storage and repeat use as well as the immediate job. A product that works perfectly once but is awkward to store, service or replace can become a poor home-garage choice over time.
What this means for your setup
Your best result comes from matching capacity to the task with some margin. Running tools continuously at their limit creates heat, wear and frustration even when the specification says the job is technically possible. A controlled process is usually faster in the end because it prevents rework. If one step begins behaving differently from what you expect, stop and inspect before adding more force, heat, pressure or chemical strength.
Do not ignore electrical safety
Use listed fixtures, appropriate circuits and properly installed outlets. Avoid daisy-chaining large numbers of plug-in lights beyond the rating of cords or power strips.
Wet detailing work increases the importance of GFCI protection where required. When safety is involved, manufacturer procedures and rated equipment take priority over internet shortcuts. Saving a few minutes is never worth creating a lifting, electrical or braking hazard.
How to know when the job is beyond DIY
Think about storage and repeat use as well as the immediate job. A product that works perfectly once but is awkward to store, service or replace can become a poor home-garage choice over time. Your best result comes from matching capacity to the task with some margin. Running tools continuously at their limit creates heat, wear and frustration even when the specification says the job is technically possible.
Wall color and garage finish change how much light you need
Dark walls absorb light, while white or light gray walls reflect it back toward the vehicle. A freshly painted light-colored ceiling can make an existing lighting system feel dramatically brighter. Glossy wall finishes can create distracting hotspots, so a lighter matte or eggshell finish is often easier on your eyes.
Keep the floor and lower walls reasonably clean because bright detail lighting reveals everything. If the garage is used for mechanical work too, protect detailing lights from oil mist and grinding debris. Lenses that can be wiped clean are easier to maintain.
Use multiple switching zones instead of one all-or-nothing circuit
Separate ceiling rows, wall lights and inspection lights onto different switches or smart controls. Interior cleaning may only need broad ambient light, while polishing a black hood benefits from focused directional light and fewer competing reflections. Zoned lighting also reduces heat and power use when you are not doing correction work.
If you install dimmable fixtures, verify the dimmer is compatible with the LEDs. Flicker and inconsistent output can make surface inspection tiring. Quality drivers and stable color output matter more than decorative effects.
Test the lighting with an actual dark-colored panel
Before permanently mounting every fixture, park a black or dark-colored vehicle in the working position and inspect the hood, doors and quarter panels from several angles. Temporary plug-in fixtures or extension cords let you experiment with spacing. You may discover that one movable side light adds more correction value than another row of ceiling fixtures.
Also check how the light behaves on glass and interiors. Excessive glare from white leather, chrome and windshields can make interior work tiring. A good garage lighting plan lets you switch zones so the environment changes with the task.
Maintenance keeps a lighting system consistent
LED fixtures slowly collect dust, polishing residue and airborne grime that reduce output and change how reflections look. Wipe lenses periodically and replace failed fixtures with units that match the existing color temperature and beam style when possible. If one side of the garage begins looking warmer or dimmer than the other, color judgment becomes less reliable. Keeping the lighting clean is a small maintenance job that protects the quality of every detailing job performed under it.
Frequently Asked Questions
Detailing lighting is less about one perfect fixture and more about combining broad visibility with reflections that reveal defects.
How many lumens do you need for a detailing garage?
There is no single number because garage size, wall color and fixture distribution change the result. Bright even illumination is more important than one high-output fixture.
For correction work, add focused inspection lighting regardless of ambient lumen total. When safety is involved, manufacturer procedures and rated equipment take priority over internet shortcuts. Saving a few minutes is never worth creating a lifting, electrical or braking hazard.
Is 5000K better than 4000K for detailing?
Both can work. Around 5000K feels closer to daylight and is popular for workspaces, while 4000K can be more comfortable for long sessions. Adjustable inspection lights are ideal when judging paint.
CRI and beam quality matter as much as color temperature. Your best result comes from matching capacity to the task with some margin. Running tools continuously at their limit creates heat, wear and frustration even when the specification says the job is technically possible.
Are hex garage lights good for paint correction?
They provide strong ambient light and dramatic reflections, but the busy pattern can make fine defect reading difficult. Use them as part of the garage lighting, not your only inspection source.
A simple directional LED is easier for close correction checks. That detail matters because it changes how safely and efficiently the job can be completed. You should choose the tool or method around the actual vehicle and working conditions rather than a headline specification.
What CRI should detailing lights have?
CRI 90 or higher is a useful target for inspection and color judgment. High CRI improves how accurately colors and materials appear.
Basic ambient fixtures can be lower, but your close inspection lights should be better. A controlled process is usually faster in the end because it prevents rework. If one step begins behaving differently from what you expect, stop and inspect before adding more force, heat, pressure or chemical strength.
Should you put lights on the walls?
Yes if you do paint correction regularly. Side lighting reduces dark areas on vertical panels and lets you create shallow-angle reflections.
Movable stands can provide the same benefit without permanent installation. Good preparation also reduces the amount of expensive equipment you need. Clean surfaces, correct access and a clear workflow often matter more than buying the most powerful version of every tool.
Conclusion
Use bright, even ceiling lighting plus directional inspection lights. Prioritize high color rendering, minimal dark zones and movable lights that can rake across paint at shallow angles. The safest and most cost-effective result comes from choosing capacity and technique for the real job rather than buying or using more than the situation requires.
If the vehicle, tool or procedure falls outside what you can verify confidently, use the manufacturer’s service information or a qualified technician. Good garage work is repeatable, controlled and safe.